
Get the matching key from another device
- Note the Key ID. Copy the first eight characters shown on the locked PC. The ID identifies the saved record; it is not the number that unlocks the drive.
- Open the right account. For a personal PC, use Microsoft’s recovery-key page on the second device. For a work or school PC, use the organisation’s recovery route.
- Find the record with the matching ID. Check the ID rather than choosing by device name or the newest date. A record from a different account, drive or earlier recovery configuration may not match.
- Enter that record’s full 48-digit key. Type the eight groups of six digits into the recovery field on the locked PC. Keep the full number private.
Choose the next step for the result you see: the account shows no keys, this is a work or school computer, or the key is rejected or the screen returns. Before resetting anything, read what happens if no matching key can be found.
Match the Key ID before entering the number
The identifier selects the saved entry; the long numerical value beside it unlocks the drive. In Microsoft’s illustrated recovery example, the highlighted Key ID begins B2E58F0C. A reader following that example would look for the saved record with that same ID, then use the separate 48-digit recovery key associated with it.
The ID can contain letters, while the recovery key you enter consists of digits. Do not type B2E58F0C into the recovery field or choose an entry merely because its date looks recent.
Check the account that originally received the key
For a personally managed PC, open the recovery-key page from another device and inspect the available records. If Windows 11 version 24H2 or later shows an account hint on the recovery screen, use it to identify the account. Microsoft’s preboot-screen documentation explains that these hints reflect where recovery information was saved.
A different account may have been used when the PC was first configured. That can be an older address you still control, or an account belonging to the family member who set it up. Ask that person to inspect their own recovery-key records rather than sharing their account password. Match the screen’s ID before using any number they find.
Encryption can also be present even if you do not remember switching it on. On supported hardware, Device Encryption can turn on during account-based setup, including on Windows Home. The absence of the full BitLocker management interface on a Home PC does not mean the drive must be unencrypted.
Seeing the computer listed in an account is a clue, not the final result. The useful item is a saved recovery entry with a matching ID. If there is no such entry, continue through the other possible holders and backups instead of repeatedly refreshing the same page.

Use the organisation’s recovery route for a managed PC
For a work or school machine, try My Account with the relevant organisational account. Under Devices, select the Windows device and look for View BitLocker Keys. Your administrator can restrict self-service access, so the absence of that option does not establish that the organisation has no key.
If the device is enrolled in Intune, the Company Portal route is another documented option. On the Company Portal website, choose Devices, select the affected PC, then Get recovery key and Show recovery key. This requires the appropriate enrolled device, work or school account and permission to view the key. It is not a general lookup service for a PC you encrypted personally.
If neither route yields the matching entry, contact the organisation’s helpdesk. Give them the device name if known, the Key ID, the wording of the prompt and what changed before the problem began. Those details help locate the right record and investigate the trigger. Send the information through the organisation’s normal support channel.
Microsoft’s helpdesk recovery procedure covers retrieval from Microsoft Entra ID or Active Directory, subject to the device’s configuration and the administrator’s access. Identity verification belongs in that process.
When your Microsoft account shows no recovery keys
An empty page answers a limited question: that signed-in account is not showing you a usable stored copy. Check whether you are in the intended personal account, whether setup used another account, and whether a work or school organisation managed the device. Then check any paper or removable-media backup you made.
Read a saved text file on a working device. If you have a printed copy, compare its Key ID with the prompt before entering the number. A USB device may hold a text file to read or a recovery-key file to use; do not assume that plugging in any Windows installation USB supplies the missing secret.
There is another distinction if an administrator talks about a key file. The BitLocker recovery overview describes a removable-media recovery key stored in a .bek file, as well as the 48-digit recovery password. A text document containing the number and a .bek file are different recovery materials. Use the method appropriate to what was actually backed up.
The account and file are alternative storage locations, not interchangeable passwords. Microsoft’s backup instructions show the choices available when making copies. A saved file inside the drive that is currently locked cannot help you read that drive. Look for an independently accessible copy.
If the PC is locked before Windows starts, advice to open Settings, decrypt the drive and turn encryption on again is not an immediate recovery procedure. Those actions require access you do not yet have. Keep the search focused on an existing matching copy or an authorised organisational recovery option.
If a key is rejected or the prompt returns
First compare the Key ID again. A computer can have more than one encrypted volume and more than one historical recovery record. A key that belongs to a different prompt is not made correct by being associated with the same device name. Re-enter the matching number carefully, keeping the six-digit groups in order.
On managed devices, the record may change after recovery or servicing. Intune supports recovery-key rotation to replace a key that has been used or potentially exposed. An old screenshot or printed copy may therefore no longer match the current prompt. Ask IT for the entry associated with the ID you see now.
A key that unlocks the volume has completed the encryption part of recovery. It does not prove that Windows, its boot configuration or the hardware is healthy. If the machine returns to recovery, record whether the key was rejected or accepted before the restart. That difference gives support a much better starting point than reporting only a blue screen.
Firmware, TPM and boot changes are among the documented recovery triggers. The TPM is the security component normally involved in releasing the drive’s encryption material during startup. Changing or clearing its configuration while troubleshooting can create another recovery requirement. Follow device-specific or organisational instructions instead of trying random firmware switches.
On Windows 11 version 24H2 or later, the preboot screen can also show additional recovery information when you press Alt. Record the error category and code for IT or the device manufacturer. That is more useful evidence than changing several boot settings and losing track of the original condition.
What remains possible if no matching key can be found
There is no universal recovery number that an account password, serial number or support agent can generate for your encrypted files. Dell’s recovery guidance also makes the limitation explicit: if the needed key cannot be located and the relevant configuration change cannot be reversed, resetting the device becomes the fallback. That restores a usable computer by giving up the inaccessible installation, not by decrypting its old contents.
Before that decision, establish which files already exist elsewhere. Check an independent backup, cloud copies accessible from another device, or an organisation’s protected storage. Confirm that the files you need are present and usable; the existence of a backup account alone does not tell you what it contains.
For a managed device, let IT check the configured recovery methods before erasing it. Microsoft documents additional options such as a previously configured Data Recovery Agent. That is a mechanism established for the encrypted drive, not a certificate you can create afterwards to bypass its protection.
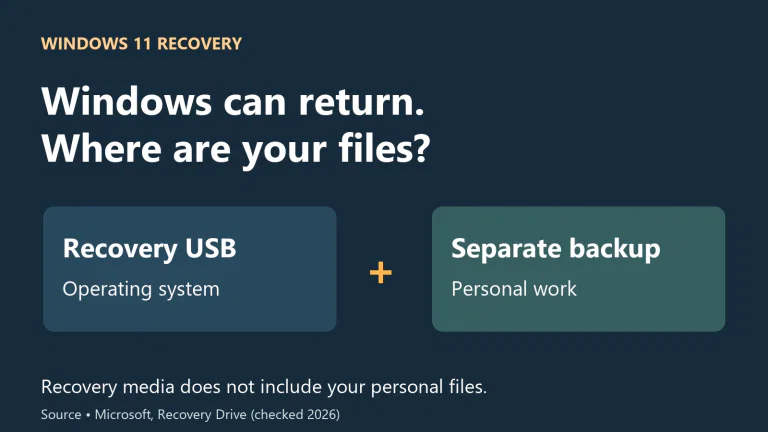
Treat Reset this PC as a separate decision. Microsoft tells users of encrypted devices to have the recovery key available, including for recovery-environment operations. The name Keep my files is not a promise to recover files from a drive you cannot unlock. If you must erase and reinstall without recovering access, assume the local files will be lost.
For a separate Windows boot failure, Quick Machine Recovery has its own requirements and can retrieve a published fix for a matching problem. It does not create a lost BitLocker key. This is why finding the key and diagnosing the repeated failure need separate attention.
After access returns, make the next recovery easier
Once you can reach your files, copy anything important to a backup before making further repair changes. Keep the recovery material accessible from a second device, and verify that you can sign in to the account holding it without relying entirely on the PC that might become locked.
Where Manage BitLocker is available, open it from Start and select Back up your recovery key beside the relevant drive. Choose the account or storage destination supported by that PC and its policy. On a managed machine, ask IT to verify the central backup rather than assuming a personal copy is permitted. A Home device can still use Device Encryption even when its available controls differ.
The full recovery number is a secret capable of unlocking the drive. Keep a paper or USB copy separate from the laptop, and avoid putting the number into public screenshots or ordinary troubleshooting posts.
Finally, preserve the cause and outcome of the incident. Note the firmware or hardware change, whether the number was accepted, and which recovery route worked. Before planned firmware servicing, use the manufacturer’s or IT team’s procedure for protecting recovery access. That record makes the next support conversation useful without exposing the recovery number itself.